Are you looking for a fun spring or Easter craft? This week we have such a fun, hands on project to try. A re-purposed thrift store bunny with a weathered stone look.We promise that once you try this technique, you will be looking for more objects in your home that you can transform!
Last week Steph and I spent a little time looking for some spring inspiration. We are both so ready for spring! It seems like winter has just dragged on. Is that ringing a bell with you?
We found a little inspiration at one of our favorite stores, Pottery Barn. Their rustic, weathered artisan vases got our creative juices flowing. Upon returning home we knew we wanted to recreate this look, but in a different way.
Our vision was to recreate this look on a thrift store bunny to get a weathered stone finish.
- Weathered Stone Look
- Supplies we used: Re-Purpose Thrift Store Bunny with a Weathered Stone Look
- Creating a Weathered Stone Look: Step 1 Preparing the plaster
- Creating a Weathered Stone Look: Step 2 Applying the Plaster
- Creating a Weathered Stone Look: Step 3 Applying Paint
- More Ideas for Spring & Easter
Sunny Side Design is a participant in the Amazon Services LLC Associates Program, an affiliate advertising program designed to provide a means for sites to earn advertising fees by advertising and linking to Amazon.com. As an Amazon Associate, this blog earns from qualifying purchases with no additional cost to you. Click here to read our full disclosure policy.

The rustic, vintage feel of the Pottery Barn vases create a sense of history. A relaxed, lived in look that we love! We knew that creating this weathered stone look on a bunny would be amazing.

We came across this post and tutorial from Lucy at Craftberry Bush. We were so inspired by her technique using plaster of paris and sand to create a weathered and vintage looking vase. We immediately gathered our supplies to create our own weathered and worn piece.
Weathered Stone Look

We followed Lucy’s tutorial on a glass vase just like she did. This weathered and rustic vase was our practice piece. Clearly, we were thrilled with the results!
After following Lucy’s tutorial, we decided to try this on a ceramic bunny.
Don’t miss our video tutorial of this transformation of a thrift store bunny into a weathered stone look.
Are you enjoying this project? Please Pin It, save it for later and share it with a friend.
Sharing is caring!
Supplies we used: Re-Purpose Thrift Store Bunny with a Weathered Stone Look
Supplies we used for a Weathered Stone Look:
- Plaster of Paris
- Fine sand
- Cold water
- Ceramic bunny
- Craft paint in assorted colors
- Old container for mixing plaster


This is our bunny that we re-purposed into a weathered stone look. To recreate this look, start scavenging thrift stores for a piece you can transform. You will want to find a piece without a lot of detail. This will make it so much easier to work with.
Creating a Weathered Stone Look: Step 1 Preparing the plaster


It is important to mix the plaster in small batches, it dries very quickly. With this in mind, it is best to start with about 1/2 C. of plaster and about 1T. fine sand.
Pour the plaster and sand into a container, anything that is disposable will do. We used an ice cream bucket. Slowly add cold water. Mix it to the consistency of a thin frosting.
We discovered if the water was warm or even room temperature the plaster hardened quicker. Once it hardens it’s impossible to work with and it had to be thrown out.
To keep the water cool, we just added ice cubes to the water container. This worked perfectly.
Another note: We used “Perfect Plaster” for our projects, because we had leftovers from a scouting project. If you have plaster of paris, that will work as well. Any crafting plaster will work.

Continue stirring the plaster until it looks like a creamy spreadable frosting. In the beginning, I added too much water, thinking it was just too thick. However, stirring tends to thin it a bit. You will have to play with it to get the feel for the right amount of water. I’m sure different humidity levels will also make a difference.
If you’re new here, welcome! We’re so glad you’re here.
Let us introduce ourselves, we’re Michelle and Steph, a mom and daughter team who love to DIY and decorate our homes.
Not only are we passionate about making our homes warm, comfortable and unique, but it’s our mission to help you create that same feeling in your own home.
You’ll find ideas for repurposing, creating, decorating and making your home truly yours, while always mindful of a tight budget.
Undoubtedly we love finding ways to make your home look high-end on a small budget.
Plus you’ll also find a recipe or two as we share our family favorites with you.
We’d love it if you’d join our community of doers so you won’t miss any inspiration for your home.
We love new friends.
Creating a Weathered Stone Look: Step 2 Applying the Plaster


This is a hands on project! It will get a little messy, there is no way around it. Begin by spreading on the plaster mixture, then smooth it around with your fingers.


Continue adding plaster over the entire bunny. When the plaster begins to dry, but is still a bit moist, press and smooth out the plaster.


When the plaster starts to feel dry add a second layer of plaster over the entire surface.

Once the entire bunny is covered with a second coat of plaster, smooth out the plaster. I did this by dipping my hands in water and rubbing them over the entire surface. Before the finial step of painting, the plaster needs to be completely dry. We let ours dry overnight.
Let’s stay connected! Follow us on social media!
Creating a Weathered Stone Look: Step 3 Applying Paint
The paint colors you choose to use is totally up to you. I decided I wanted my weathered stone bunny to look more like granite.
I choose to use 3 different grey paints, a light, medium and dark grey. I also used a soft white and a mossy green.
When we painted the vase, we used more tans and browns with a mossy green as well.


Using the lightest grey paint, cover the entire surface. I applied the paint with a paint brush, then I took a damp coffee filter and dabbed off some of the paint. As a result some of the white of the plaster was exposed. This helped add to the weathered and worn look I desired.


Once the base coat was covering the entire bunny I added the medium grey paint, dabbing it randomly on the bunny.


In the cracks and crevices I applied a dark charcoal grey paint. I used an old brush and pushed the color into the crevices, then with the damp coffee filter blended, feathered and softened the color.

I wanted the bunny to look like it had been out in the weather and have a mossy look. I dabbed on a mossy green paint around the feet and lower edge of the bunny and softened it with a damp coffee filter. The damp coffee filter will help to feather and blend the paint.


The final painting step is to add the highlights. Dab on the white paint and blend again with the damp coffee filter to soften and blend the colors.

Layering the paint on the bunny in this way creates depth. It’s amazing how much it really looks like a real weathered stone.


What do you think of our re-purposed thrift store bunny? Do you love this faux weathered stone look? It was super fun to make and made me feel like I was a sculptor.
More Ideas for Spring & Easter
- Quick & Easy Spring Bunting
- Easy DIY Easter Wreath with Dollar Store Finds
- Moss Bunny Topiary
- How to Make Spring Tulips Last Longer in a Vase
- Kate Spade Inspired Spring Tablescape
- Decorate for Easter on a Budget
- Affordable Spring Wreath with Unexpected Items
- Faux Topiary Tree That Look Real
- Decoupage Easter Eggs
We hope you found some inspiration for your home today.
Please share your tips and ideas with us.
We love hearing from you!
If you’re new here, WELCOME! We love having new readers and friends!
You can learn more about us here.
Let’s stay connected! Join our DIY community of doers and you won’t miss the weekly updates and more inspiration for you always on a budget.
Sharing is caring!

Thanks for stopping by Sunnyside Home. Empowering you to create a home you love!
Retailers We Love
- Anthropologie
- Birch Lane
- Crate & Barrel
- Joss and Main
- Lampsplus
- Mark & Graham
- One Kings Lane
- Pottery Barn
- Rejuvenation
- Serena & Lily
- Wayfair
- West Elm
- Williams Sonoma
- World Market
Be sure to follow us on Pinterest for even more home decor and DIY ideas.
To see what we are working on before it’s on our blog, follow us on Instagram.
You will also find our video tutorials on our YouTube channel.
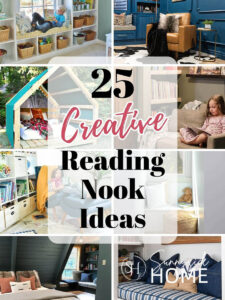
- 25 Must See Simple and Creative Reading Nook Ideas

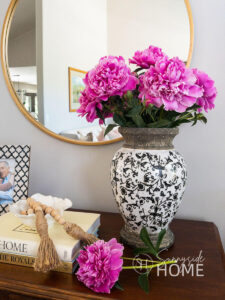
- How to Make Peonies Last Longer with 7 Simple Tricks
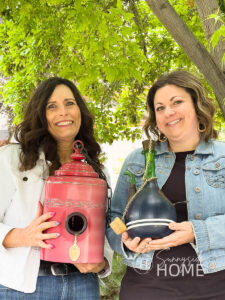
- How to Build a Birdhouse with CharmingThrift Store Finds
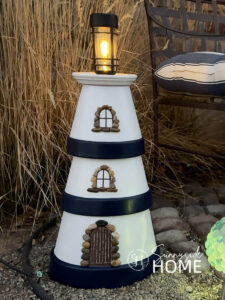
- Simple Clay Pot Lighthouse Garden Decor Project


So cool, I did last year, but I added some paint(chalk paint) to my stucko mix, it turned out great, when I sanded it down I add few other colors as I keep sanding. Love different ideas!! Thanks
Thank you Roma. I love you idea too. I’d love to try it out. Have a wonderful day!