With a few simple materials like paint and beads, discover how to breathe new life into an old and dated light fixture, creating a unique and eye-catching chandelier that will become the centerpiece of any room.
Trying to find beautiful and affordable light fixtures on a budget can be challenging!
I was looking for the perfect chandelier for Ellies bedroom makeover that fit in my budget.
With a $5 thrift store find that was in storage in my basement and a little paint, this dated chandelier was given new life.
Join us today as we share how you can transform an old brass fixture into a beautiful french country chandelier with boho flair under $30.
Sunny Side Design is a participant in the Amazon Services LLC Associates Program, an affiliate advertising program designed to provide a means for sites to earn advertising fees by advertising and linking to Amazon.com. As an Amazon Associate, this blog earns from qualifying purchases with no additional cost to you. Click here to read our full disclosure policy.
Supplies Needed
- Rust-Oleum Metal Primer
- Rust-Oleum French Cream
- Chip Brush
- Craft Paint: colors of your choice
- Package Assorted Size Wooden Beads
To see more highlights from this bedroom makeover click any link below.
- How To Paint a Room with Pro Results
- Built In Desk | Upcycling At Its Best
- Upcycle Idea | Transforming Twin Bed to Daybed
- How To Refinish Furniture | With a Raw Wood Look
- DIY Canopy for a Bed | Fit for a Princess
- Shelf Decorating Ideas | A Step by Step Guide
- Roman Shade | How to Make Them Yourself
- How To Reupholster a Chair | with French Country & Boho Flair
- DIY Mirror Frame | Quick and Easy Idea
- Antique Hardware For Dresser
- Bedroom Ideas for Tweens |Girl Room
- Area Rug For Bedroom | Top Ideas For Tween Girl
- How To Make a Bolster Pillow
- How To Make an Envelope Pillow
Thrift Store Chandelier

You know we love to frequent thrift stores and yard sales looking for tired worn out pieces that can be refinished.
We came across this brass chandelier for only $5 a couple years ago. Of course we snagged it not knowing when or where we’d eventually use it, but knew the deal was too good to pass up!
While planning Ellie’s bedroom makeover we decided to incorporate this fixture into our design.
Even though we’re bringing gold elements into the room, and I love the pop of gold with the navy wall, this fixture was just a bit too brassy for me.
We’re excited to share how we transformed this fixture into a french country chandelier using paint and wooden beads.
Before we got started we ran to Home Depot and got our all supplies.
Don’t you just hate running to the store in the middle of a project?
Are you enjoying this project? Please Pin It, save it for later and share it with a friend.
Sharing is caring!
Prep For Paint

To prepare the light fixture for paint, we first cleaned it with a damp washcloth to remove any dirt or grime.
Then we removed the white candelabra sleeves and covered the electrical fittings with frog tape.
We attached the chandelier to a bungee cord and then hung it from the garage door opener.
Our first step was to apply Rust-oleum Primer to the entire chandelier.
PRO TIP: To minimize cleanup from over spray, lay a large tarp under your working area.
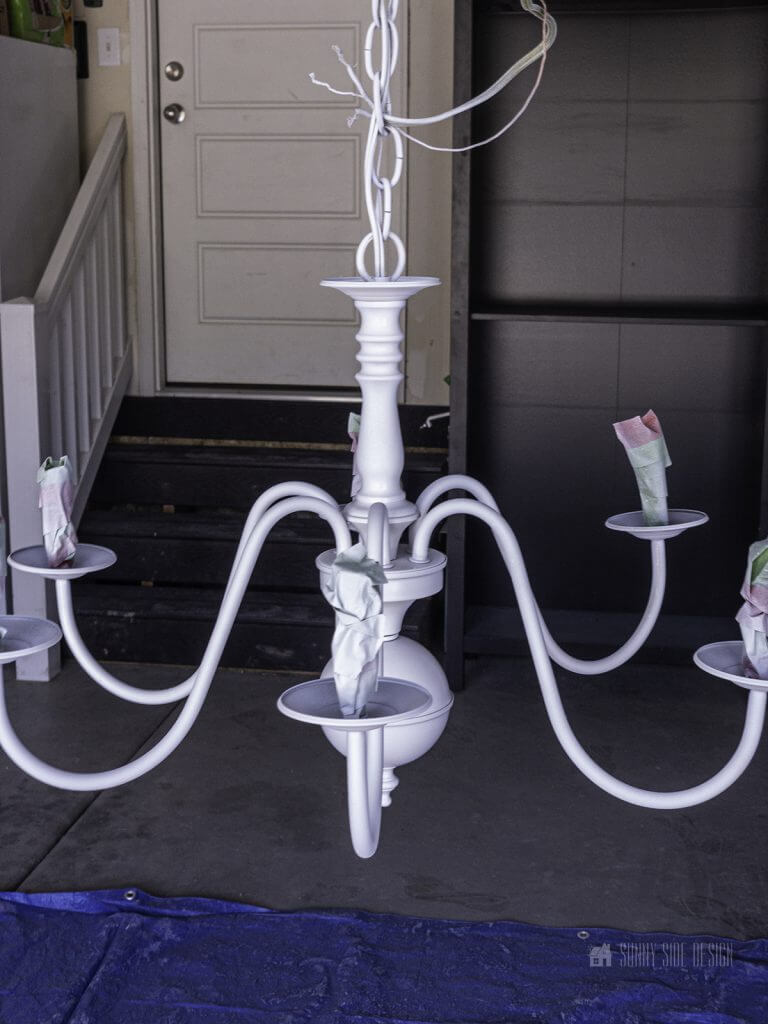
Once the primer had dried for 30 minutes, we then applied 2 coats of Rust-Oleum French Cream in a matte finish.
Using spray paint for the initial layer of paint not only made it easy, but it would’ve been a bit tricky getting a brush into all of the small crevices of the chandelier.
If you’re new here, welcome!
We’re so glad you’re here.
Let us introduce ourselves, we’re Michelle and Steph, a mom and daughter team who love to DIY and decorate our homes.
Not only are we passionate about making our homes warm, comfortable and unique, but it’s our mission to help you create that same feeling in your own home.
You’ll find ideas for repurposing, creating, decorating and making your home truly yours, while always mindful of a tight budget.
Undoubtedly we love finding ways to make your home look high-end on a small budget.
Plus you’ll also find a recipe or two as we share our family favorites with you.
We’d love it if you’d join our community of doers so you won’t miss any inspiration for your home.
We love new friends.

[mailerlite_form form_id=2]
Creating The Faux Wood Finish

To create the faux wood finish for this french country chandelier, we used four different colors, two dark brown, one slightly darker than the other, a grey and a cream color.
I know I just said it would be tricky to use a brush, but we’re not going for a full coverage with this step, so it works.
Using a small chip brush which has uneven bristle lengths, we dry brushed on each of our for colors one at a time. However, as we started painting, we soon realized that the chip brush was too big to fit in some of the areas of the chandelier. With this in mind, we pulled out our artist brushes and they worked great!
To dry brush dab the brush in a paint color. Then brush back and forth several times on a paper plate or palate removing most of the paint. Next, lightly brush onto the chandelier with short stroke. The brush leaves very defined stroke marks which mimics the appearance of wood grain.
Dry Brush Layer one
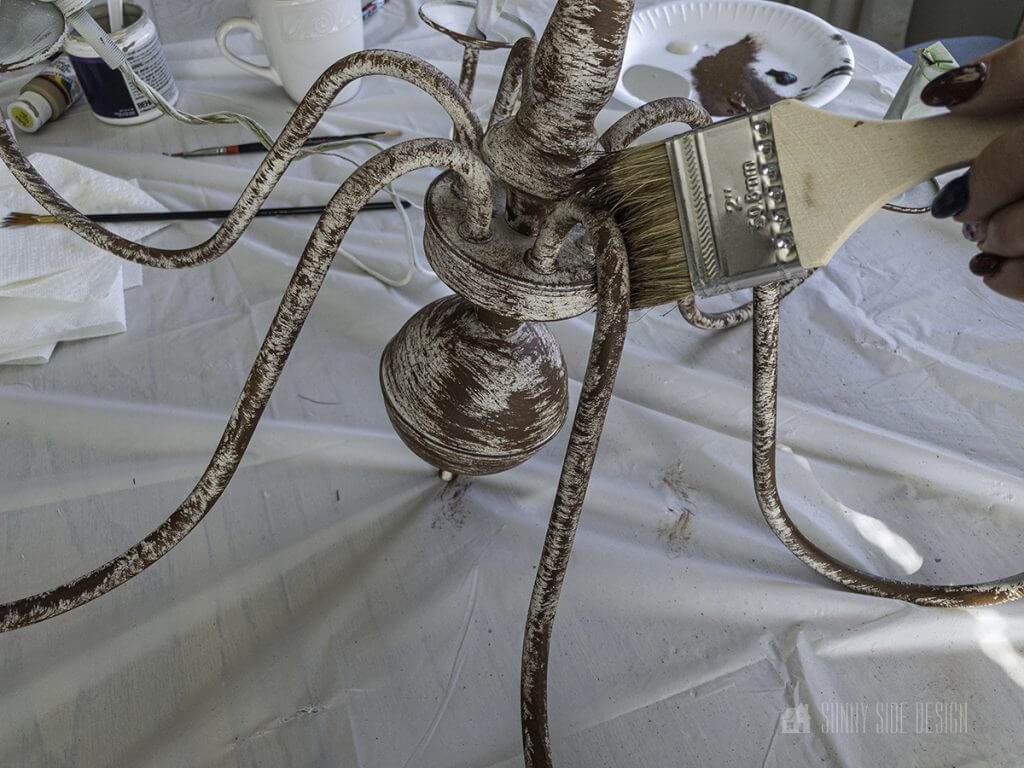
The medium brown color was applied first.
Use a dry brush method to apply the paint.

First dip the chip brush in the paint wipe on a paper towel and then streaking the paint in a horizontal motion around the chandelier.
The paint should look wispy leaving a portion of the creamy white exposed.
Dry Brush Layer Two
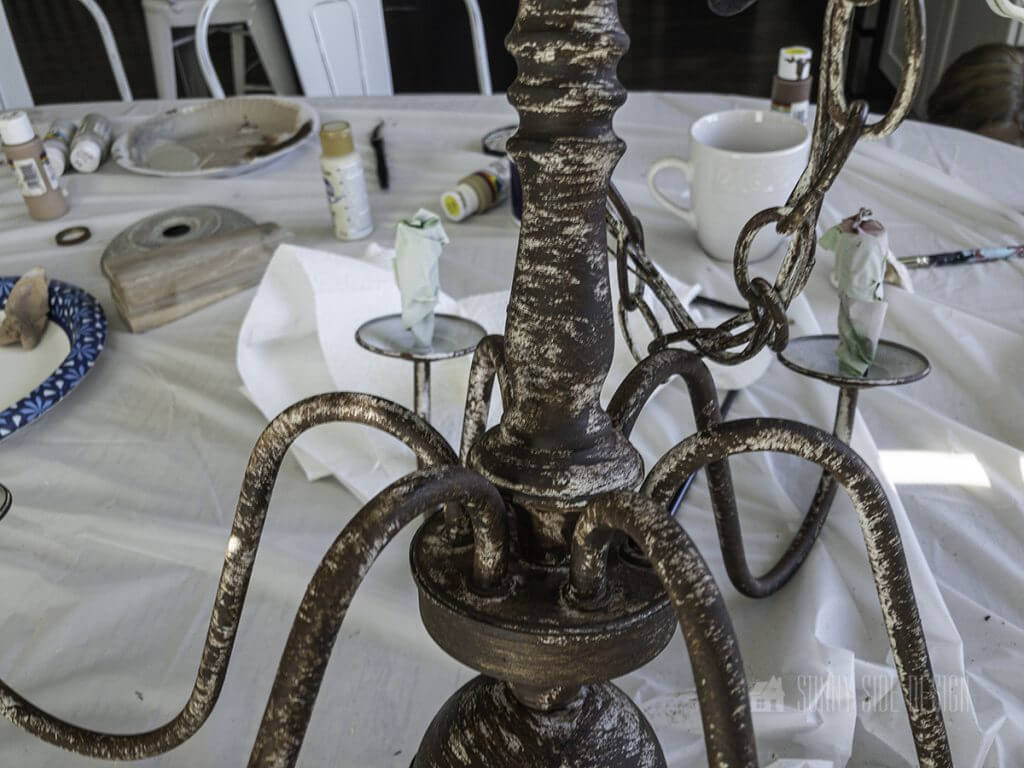
Once dry to the touch, we repeated this process with the dark brown color. This is a look at the chandelier with both shades of brown applied.
Dry Brush Layer Three

At this time, we are ready to apply the grey paint. Using this same dry brush process over the entire chandelier.
It’s now starting to look like the French country chandelier look that we were going for, but it still felt a little dark and heavy.
Let’s stay connected! Follow us on social media!
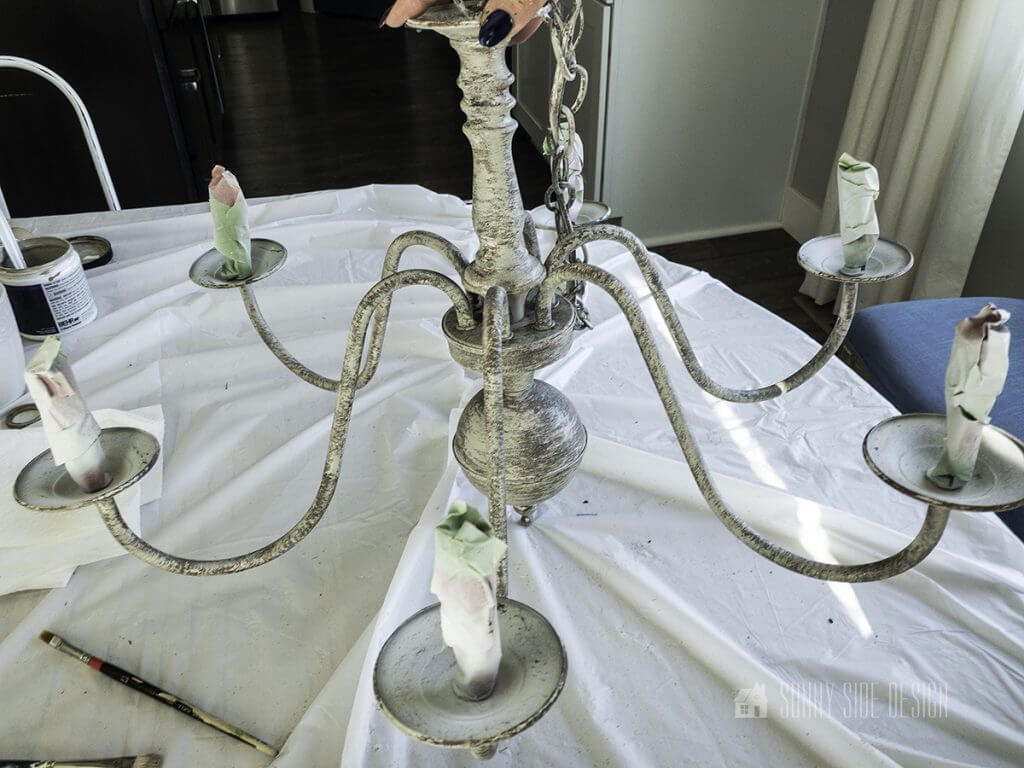
Dry Brush Layer Four

Because it was feeling a little heavy, we decided to add the light cream color. Once again using the dry brush technique, lightly adding highlights over the entire chandelier.
As you can see paint can really transform any light fixture.
Adding Boho Flair To French Country Chandelier

Here’s a look at the finished chandelier. Adding wood beads really adds a bit of whimsy and helps make it feel a little less formal.
We purchased a mixed package of wood beads from Amazon. It was a little hard to know exactly how many we’d need, so we erred on the side of caution and ordered a large variety pack.
We ended up using 4 different sizes of beads on this chandelier.
On the strands of beads that swagged from arm to arm, we used 10 of the (16mm) size beads, and 11 of the (8mm) size beads.
For the strands of beads that swagged vertically above each arm we used 10 (20mm) size beads and 11 (10mm) size beads.
We have plenty of leftover for more projects!
Create Holes for the Bead Swags

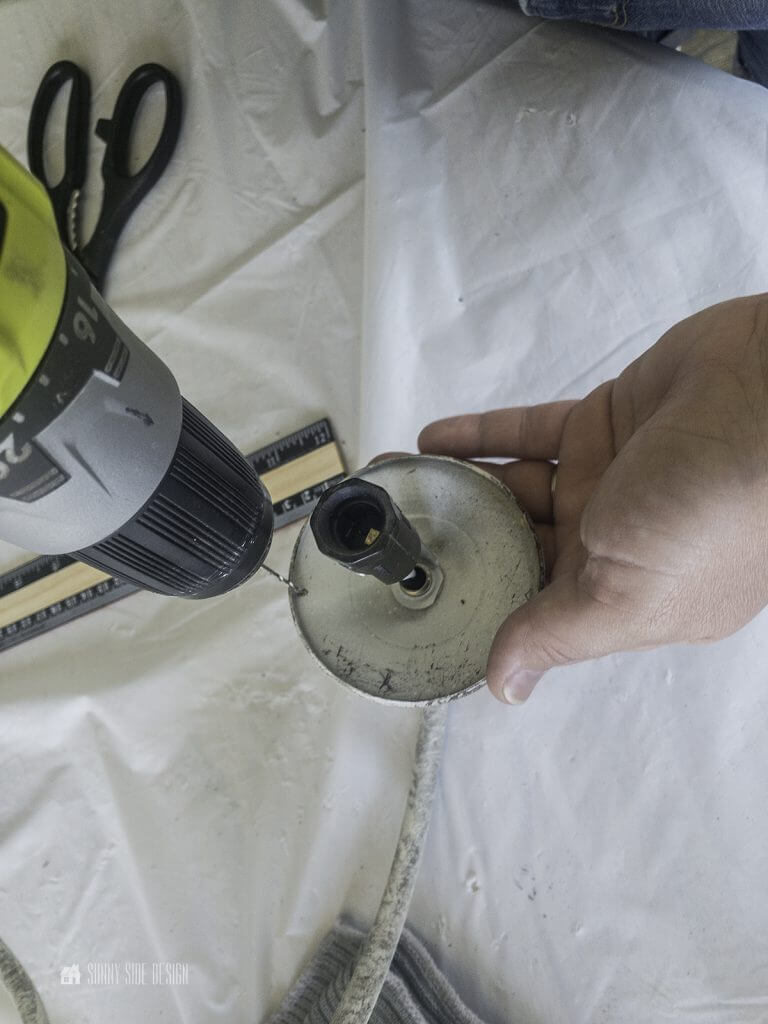

First we strung the beads on fishing line.
Then we marked where each strand would be secured.
Using a ruler as a straight edge, we then placed the ruler on two candelabra cups at a time.
Marks were made just inside each candelabra cup.
We repeated this around the entire chandelier.
Then we also used the ruler to help us eyeball a straight line vertically up each arm.
A mark was placed just inside the upper “cup” piece of the chandelier.
Using a drill with a small bit, all holes were then made in the chandelier.
Next we attached each strand of beads onto the french country chandelier, securing them into place with a square knot.
*TIP: After each knot had been made, we added a drop of clear nail polish to “glue” the knot together.
Completed French Country Chandelier

The beads really do add just that bit of boho flair to this fixture. It looks stunning with the navy wall as the backdrop. I can’t wait until all of the elements in this bedroom makeover come together.


We hope you found some inspiration for your home today.
Please share your tips and ideas with us.
We love hearing from you!
If you’re new here, WELCOME! We love having new readers and friends!
You can learn more about us here.
Let’s stay connected! Join our DIY community of doers and you won’t miss the weekly updates and more inspiration for you always on a budget.
Sharing is caring!

Thanks for stopping by Sunny Side Design. Empowering you to create a home you love!
DISCLAIMER
This blog’s content is for entertainment purposes only and is not professional advice. By reading this blog and attempting to recreate a project, you assume all responsibility for any injuries or damages incurred. Read my full disclaimer here.
PHOTO USE AND CONTENT SHARING
All of the photographs you see here are the property of Sunny Side Design unless otherwise credited.
We love for others to share our work, so please feel free to use one photo with a link back to our website.
Pinning and sharing is always encouraged!
Please do not reproduce other Sunny Side Design content without permission.
Retailers We Love
- Anthropologie
- Birch Lane
- Crate & Barrel
- Joss and Main
- Lampsplus
- Mark & Graham
- One Kings Lane
- Pottery Barn
- Rejuvenation
- Serena & Lily
- Wayfair
- West Elm
- Williams Sonoma
- World Market
Be sure to follow us on Pinterest for even more home decor and DIY ideas.
To see what we are working on before it’s on our blog, follow us on Instagram.
You will also find our video tutorials on our YouTube channel.
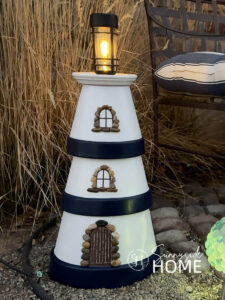
- Simple Clay Pot Lighthouse Garden Decor Project

- Simple Tabletop Fire Bowl DIY in Under 10 Minutes
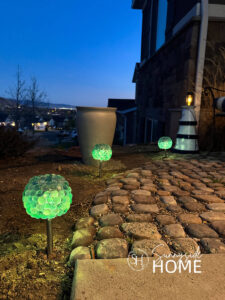
- Simple Dollar Store Solar Lights Glow-Up
- The Best Budget-Friendly Backyard Ideas We’ve Made