We are so excited to share some organizing tips today in the mudroom. This mudroom is in Stephanie’s house, it’s the transition area between the garage and living area, a great spot to implement some custom storage. Their home builder had included a built-in bench in this area, but no storage. When they built their home they opted to not have the bench installed, planning on someday incorporating some built-in storage.
If you are look for more ideas to organize your home, check out 30 Small Kitchen Organization ideas.
Sunny Side Design is a participant in the Amazon Services LLC Associates Program, an affiliate advertising program designed to provide a means for sites to earn advertising fees by advertising and linking to Amazon.com. As an Amazon Associate, this blog earns from qualifying purchases with no additional cost to you. Click here to read our full disclosure policy.
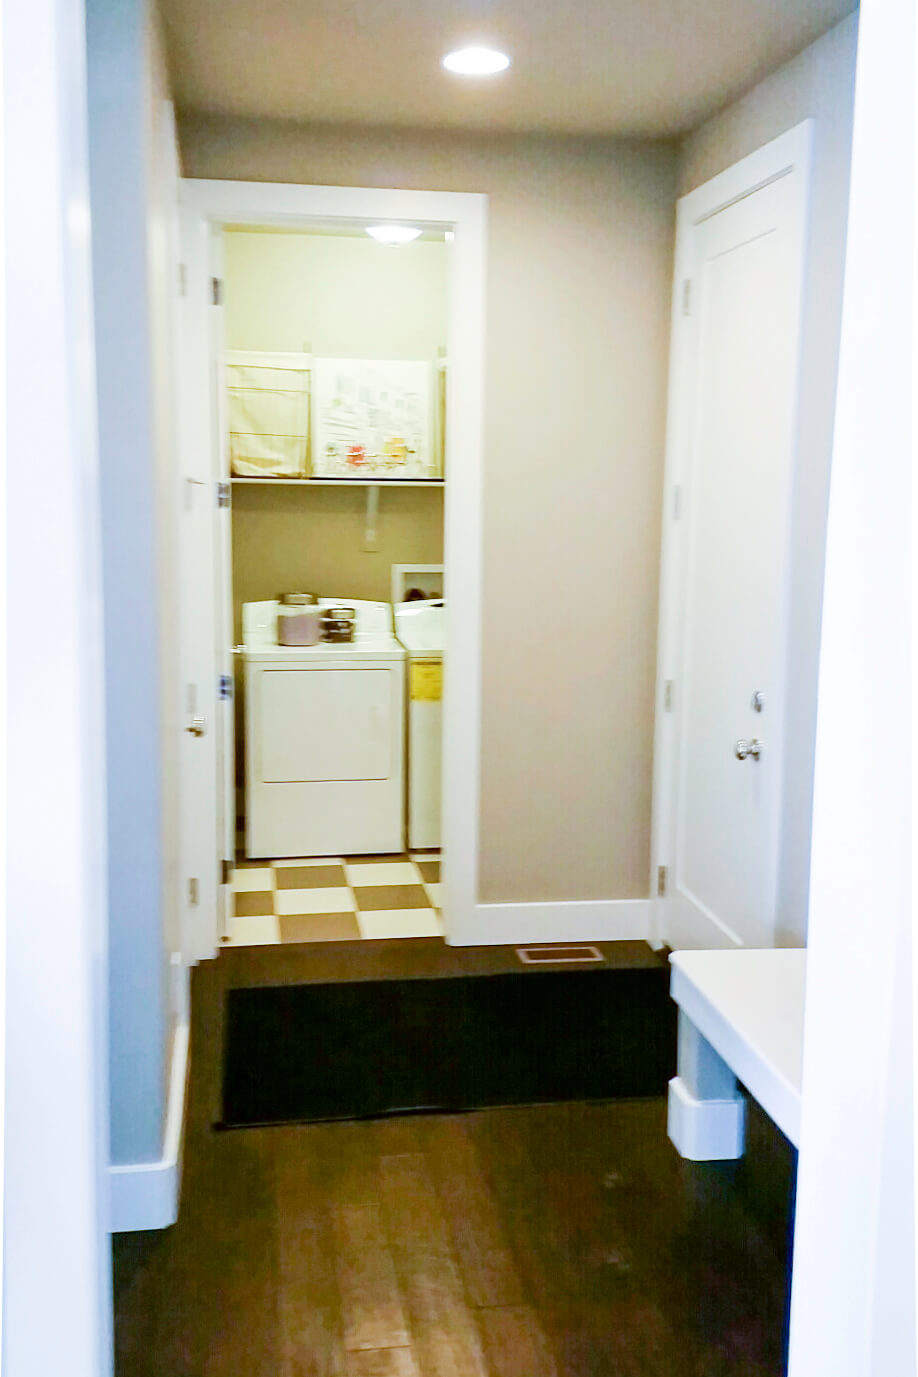
This is a view of the mudroom area from the model home that Dan and Steph looked at. Notice that there is a bench and not storage. The wall above the bench just has artwork.
It has taken 2 years to finally get around to building this storage area in their mudroom. With three children, who are constantly coming and going and with all their stuff, they were in great need of storage solutions. I believe kids really excel with structure. They need to know what is expected of them and know where THEIR things go. It’s amazing how well children will respond when there is a designated spot for their items. They suddenly become excited about cleaning up after themselves.

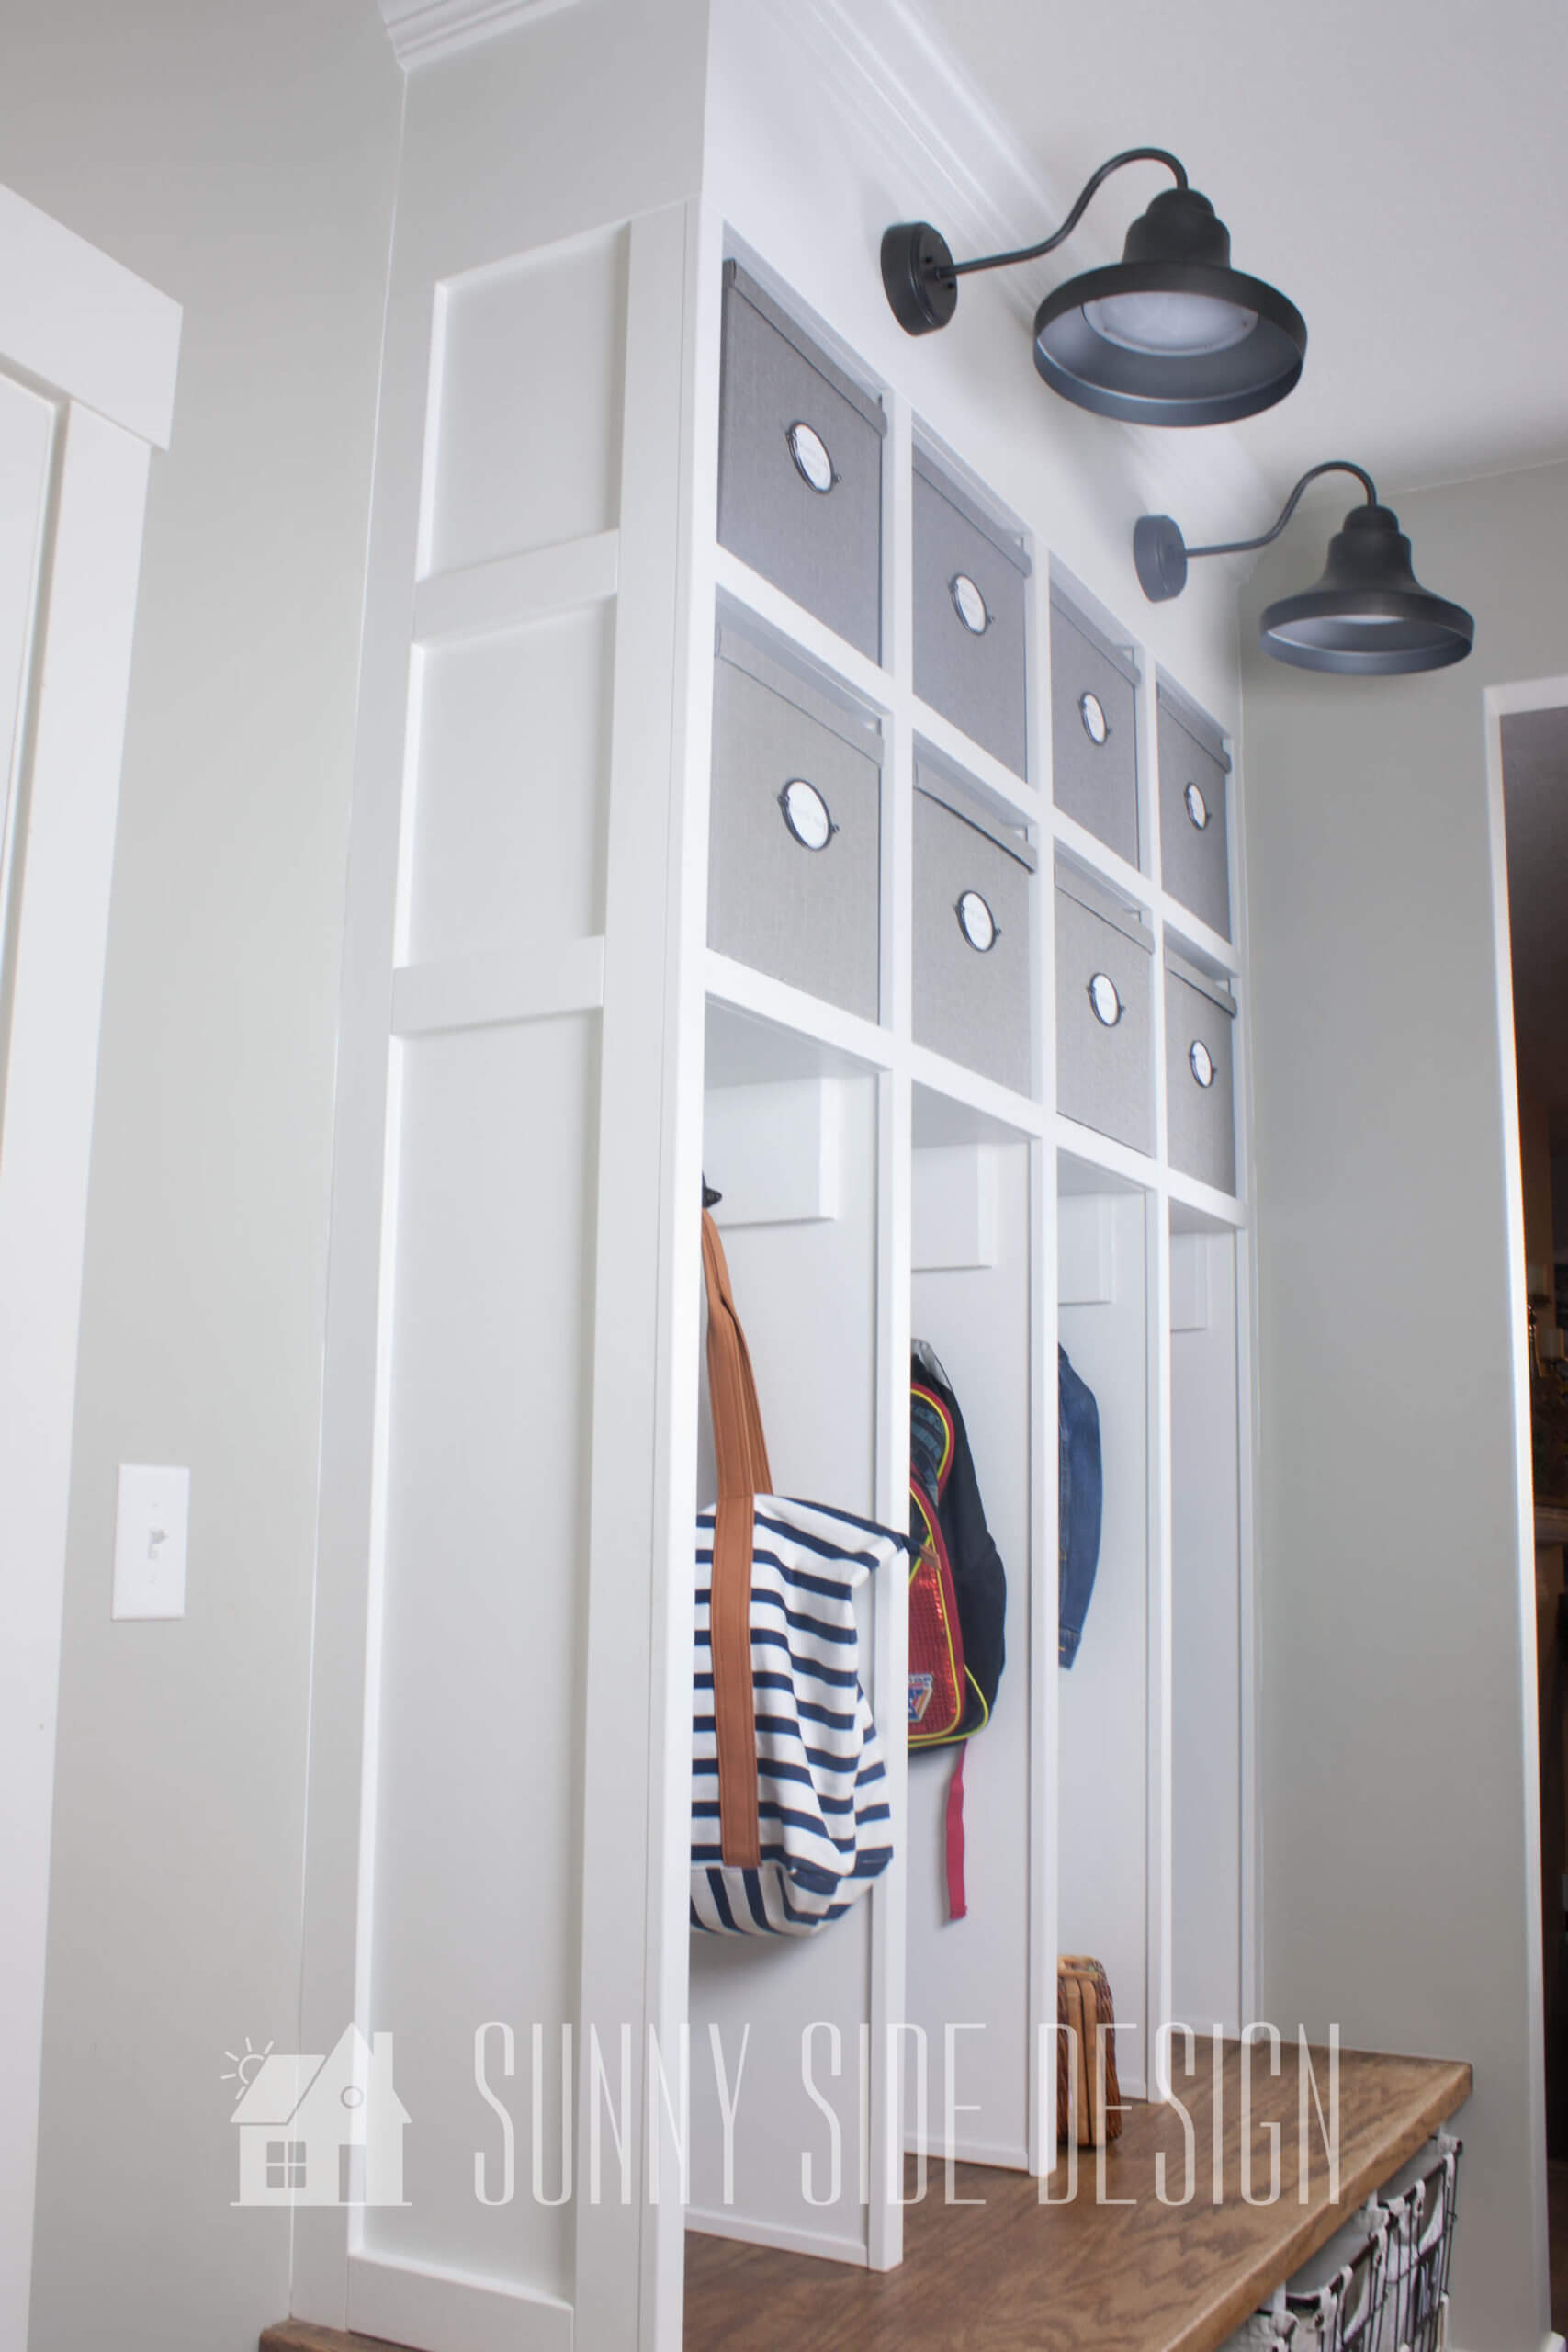
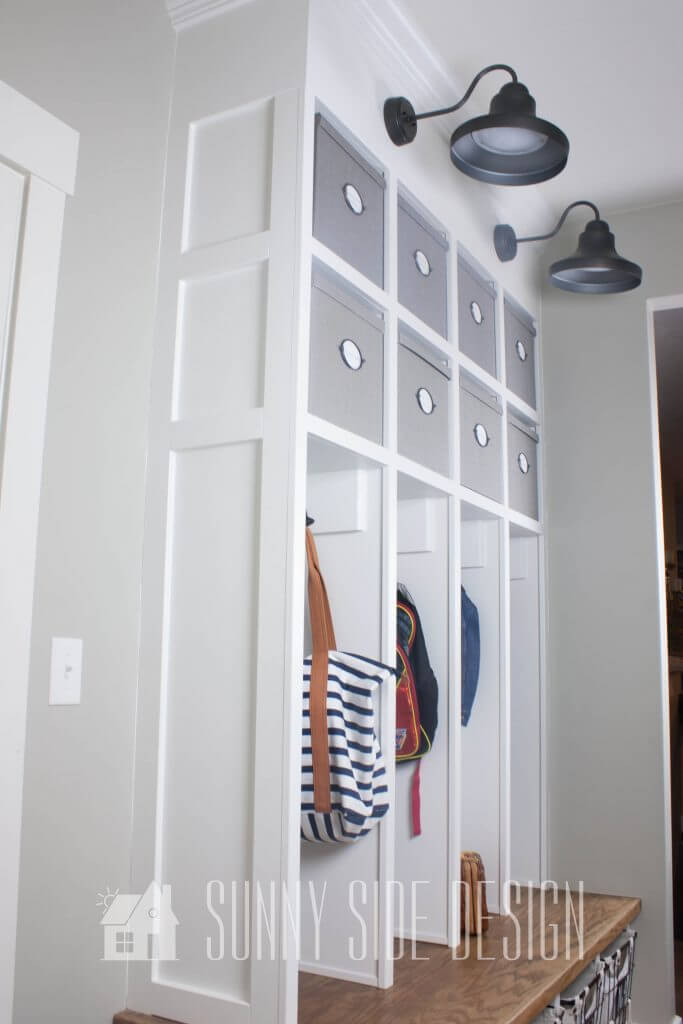
Stephanie desired storage for shoes, coats, backpacks, hats, gloves. Taking the storage all the way up to the ceiling is a smart way to utilize the space. Using every bit of vertical space not only gives much more storage, but it is very aesthetically pleasing to bring the cabinets to the ceiling.
These are the steps we used to create this space:
1- Analyze what you would like to store in the area. If there is a need for large or cumbersome items allow for this in the planning. Stephanie wanted a place for coats, hats, gloves, backpacks, purse, etc. Everything that is needed as you are heading out the door. She also requested a place to sit and put shoes on and take them off.
2- Sketch up a plan, utilizing the space that you have. Stephanie has tall 9’ ceilings in the mudroom, so we wanted to utilize all that space. Having extra storage here is a BONUS.
Are you enjoying this project? Please Pin It, save it for later and share it with a friend.
Sharing is caring!

3- Now here is where we used the brains of my husband, Steve. We show him what we want and he implements how to construct it. Be sure to check out the complete tutorial on how we built this storage.
4- Now is the fun part, placing all their items into the cabinet. We allowed the kids to be involved placing their items in their area. Each child was assigned a space, (Dan and Steph share one of the cubbies).

Each of the kiddos have their own cubby with sturdy hooks for hanging jackets, coats, hats, backpacks etc. Once the kids know where to put their belongings, they are really good at putting them in THEIR spot. They know when they walk in the door where to hang their coats and backpacks. The coat racks were designed to be low enough that even the youngest one can climb up on the seat to hang his items too.

An integrated bench provides seating for taking on and off shoes, this encourages everyone to take off their muddy shoes. There are also cubbies with wire baskets below for shoe storage. We found these cute wire baskets online at Walmart. They are Better Homes and Gardens.
If you’re new here, welcome! We’re so glad you’re here.
Let us introduce ourselves, we’re Michelle and Steph, a mom and daughter team who love to DIY and decorate our homes.
Not only are we passionate about making our homes warm, comfortable and unique, but it’s our mission to help you create that same feeling in your own home.
You’ll find ideas for repurposing, creating, decorating and making your home truly yours, while always mindful of a tight budget.
Undoubtedly we love finding ways to make your home look high-end on a small budget.
Plus you’ll also find a recipe or two as we share our family favorites with you.
We’d love it if you’d join our community of doers so you won’t miss any inspiration for your home.
We love new friends.
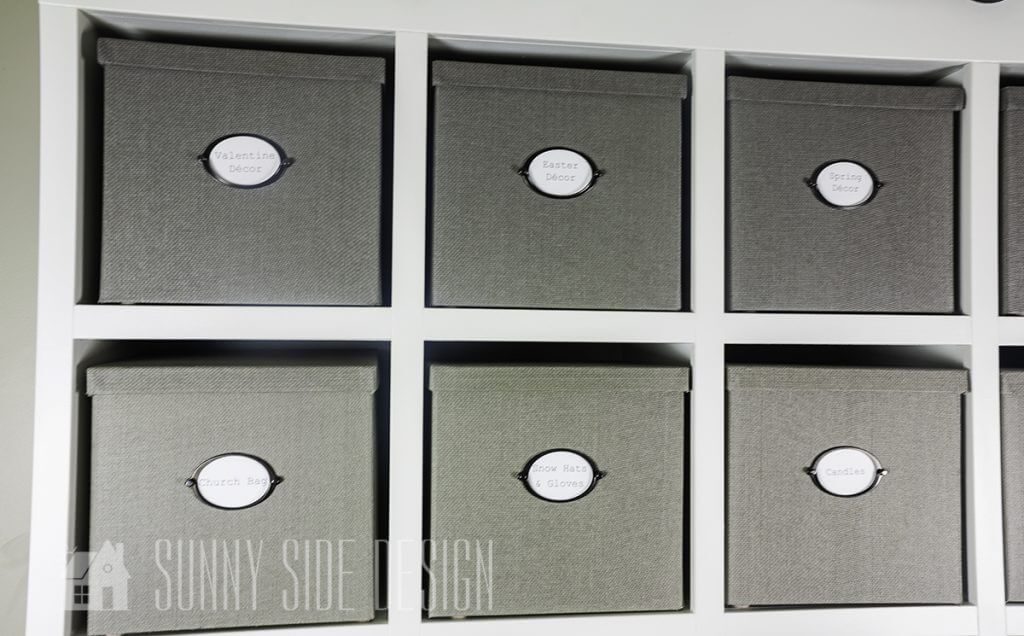
We did not want any dead space here, vertical storage all the way to the ceiling makes good use of the area. Above the coat hanging area, we have two rows of cubbies that were built to hold the Ikea’s KVARNVIK boxes. Here we wanted closed storage for hats, gloves etc.


Bonus! There was so much extra space here that Stephanie is able to store some small home decor items, like candles here. She also has storage space here for some holiday decor items. Each of the storage boxes are labeled for easy identification.

Labeling is key here to keep this location organized. I don’t know about you but I probably need to label every cabinet and drawer in my kitchen. When Steve is helping in the kitchen, he is always asking where things go, even after 4 years in the “new” house he still struggles. (insert rolling eyes emoji)
Let’s stay connected! Follow us on social media!
Look how amazing and clutter free this area is, it’s enough to make me giddy! We hope this gives you some great ideas for organizing your space.

Make sure to check out the tutorial on how we constructed this mudroom storage .
More Organizing Ideas for Your Home
- The Best Tips to an Organized and Functional Garage
- 25 Must See Ideas for Organizing Under Kitchen Sink
- How to Organize Your Bathroom Cabinet on a Budget
- Easy Garage Wall Storage
- How to DIY Storage for Artificial Flowers
- How to Organize Toys
- Useful Laundry Room Organization Ideas
- The Best Freezer Organization Ideas
- Clever Bathroom Storage Ideas
- Craft Room Organization Ideas
- Organize your Fridge in 5 Simple Steps
- Amazing Organizing Ideas for your Kitchen
- Conquer Paper Clutter
Enjoying this post?! Please Pin It, save it for later and share it with a friend.
We hope you found some inspiration for your home today.
Please share your tips and ideas with us.
We love hearing from you!
If you’re new here, WELCOME! We love having new readers and friends!
You can learn more about us here.
Let’s stay connected! Join our DIY community of doers and you won’t miss the weekly updates and more inspiration for you always on a budget.
Sharing is caring!

Thanks for stopping by Sunnyside Home. Empowering you to create a home you love!
Retailers We Love
- Anthropologie
- Birch Lane
- Crate & Barrel
- Joss and Main
- Lampsplus
- Mark & Graham
- One Kings Lane
- Pottery Barn
- Rejuvenation
- Serena & Lily
- Wayfair
- West Elm
- Williams Sonoma
- World Market
Be sure to follow us on Pinterest for even more home decor and DIY ideas.
To see what we are working on before it’s on our blog, follow us on Instagram.
You will also find our video tutorials on our YouTube channel.
- Simple Dollar Store Solar Lights Glow-Up

- The Best Budget-Friendly Backyard Ideas We’ve Made

- 6 Simple Easter Table Settings for a Beautiful Spring Table
- 15 Simple Decorating Ideas for Spring with Common Thrifted Items