Let’s dive into repurposing a thrift store hutch top into a gorgeous French-inspired cabinet.
If thrifting is your love language…then you’re going to love todays project.
No doubt we find the best treasures this time of year, when everyone is decluttering.
Do you agree?!
I guess it’s a little ironic that we pull up to donate and then fill up the car with new found treasures.
On a recent thrifting trip, I spotted this old hutch top for only $5.
No question it was coming home with me, I knew it could be fabulous!
Not only did we find the old hutch top, but we came home with ideas for a total 13 items we flipped.
To see how we reimagined and used these items in homes take a look at our latest video.
Join us as we breathe new life into a thrift store find and unleash the potential of a china cabinet top in ways you never imagined.
The Potential of a Hutch Top Repurposed
An old hutch top is an incredibly versatile piece that can easily be repurposed around your home.
With a little creativity you can transform it into a useful piece and give it new life.
Whether you find one while thrifting or on Facebook Marketplace, hutch tops offer an affordable and accessible option for DIYers.
With a bit of imagination and ingenuity, these pieces can be transformed into stunning bookshelves, or a stylish display cases, mounted to the wall you can create a unique kitchen cabinet, or mount it in the laundry room for additional storage.
The affordability and availability of hutch tops make them a prime choice for budget-friendly home decor upgrades, allowing you to unleash your creativity without breaking the bank.
Materials Used For Repurposed Hutch Top
To make our french-inspired cabinet we used the following materials and tools:
- thrifted hutch top
- select pine boards for the top (3/4″x7 1/4″x6′)
- black chalk paint
- white chalk paint
- wax
- furniture legs
- TSP or Dawn dishsoap
- Bar Keepers Friend
- Rub ‘n Buff (antique gold)
- wallpaper (contact paper)
- wood glue
- screws
- pocket hole jig
- saw
- orbital sander
- brad nailer
- drill
- Kreg Rip-cut
Enjoying this project?! Please PIN IT, save it for later and share it with a friend.
Sharing is caring!
Prep Hutch Top for Paint
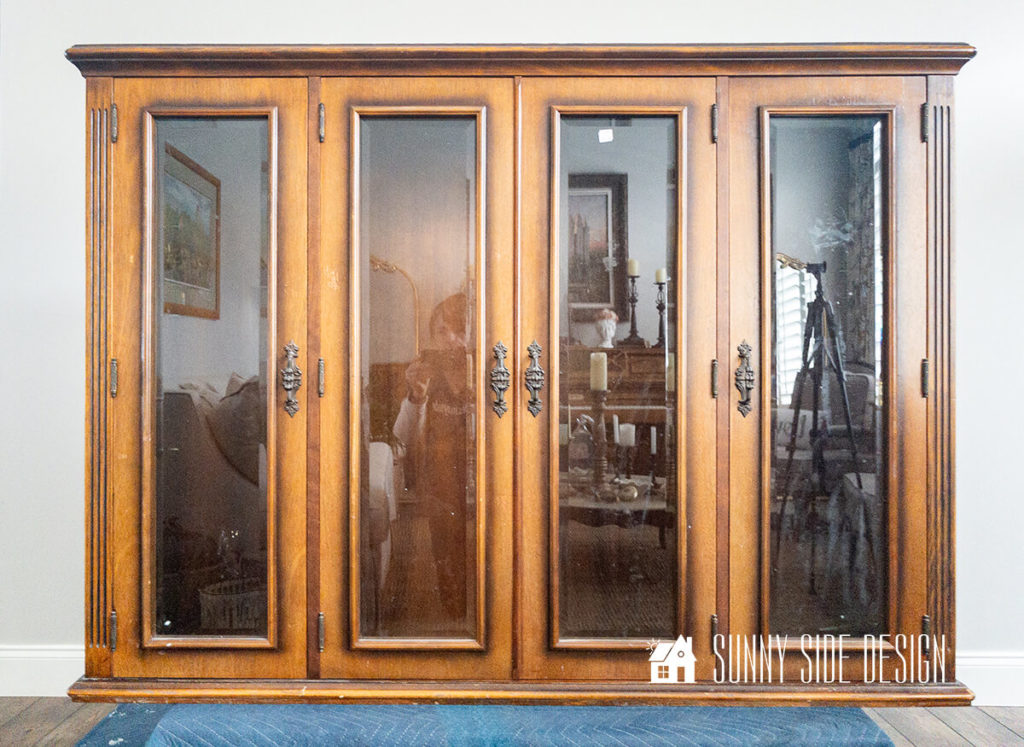
Preparing the hutch top for paint is a crucial step in achieving a flawless finish and ensuring the longevity of your project.
Begin by thoroughly cleaning the surface with a degreaser like TSP or Dawn dishwashing liquid to remove any dirt, grease, or residue.
If you are painting your cabinet with latex paint, sand the surface lightly with fine-grit sandpaper to create a smooth and even texture, paying extra attention to any rough areas.
This step not only helps the paint adhere better but also ensures professional-looking results.
After sanding, wipe down the surface with a tack cloth to remove any dust.
Finally, prime the hutch top with a high-quality primer.
This primer will create a smooth base for the paint and enhance its durability.
Taking the time to properly prepare the hutch top before painting will ultimately yield superior results and a beautifully finished piece that you can enjoy for years to come.
In our case we are using a chalk paint, so no sanding is required.
But I will say that because we used white chalk paint for the interior of the hutch top, it took three coats.
So, if I would have used primer, it probably would have only taken two coats of paint.
If you’re new here, welcome! We’re so glad you’re here.
Let us introduce ourselves, we’re Michelle and Steph, a mom and daughter team who love to DIY and decorate our homes.
Not only are we passionate about making our homes warm, comfortable and unique, but it’s our mission to help you create that same feeling in your own home.
You’ll find ideas for repurposing, creating, decorating and making your home truly yours, while always mindful of a tight budget.
Undoubtedly we love finding ways to make your home look high-end on a small budget.
Plus you’ll also find a recipe or two as we share our family favorites with you.
We’d love it if you’d join our community of doers so you won’t miss any inspiration for your home.
We love new friends.

[mailerlite_form form_id=2]
Add a Top
I believe you find that most old hutch tops will have a decorative moulding around the top and will require you to add a wood top.
For my hutch top I purchased two 6′ select pine boards.
The boards were only 7.25″ wide, so we needed to glue the two boards together to fit my china cabinet top.
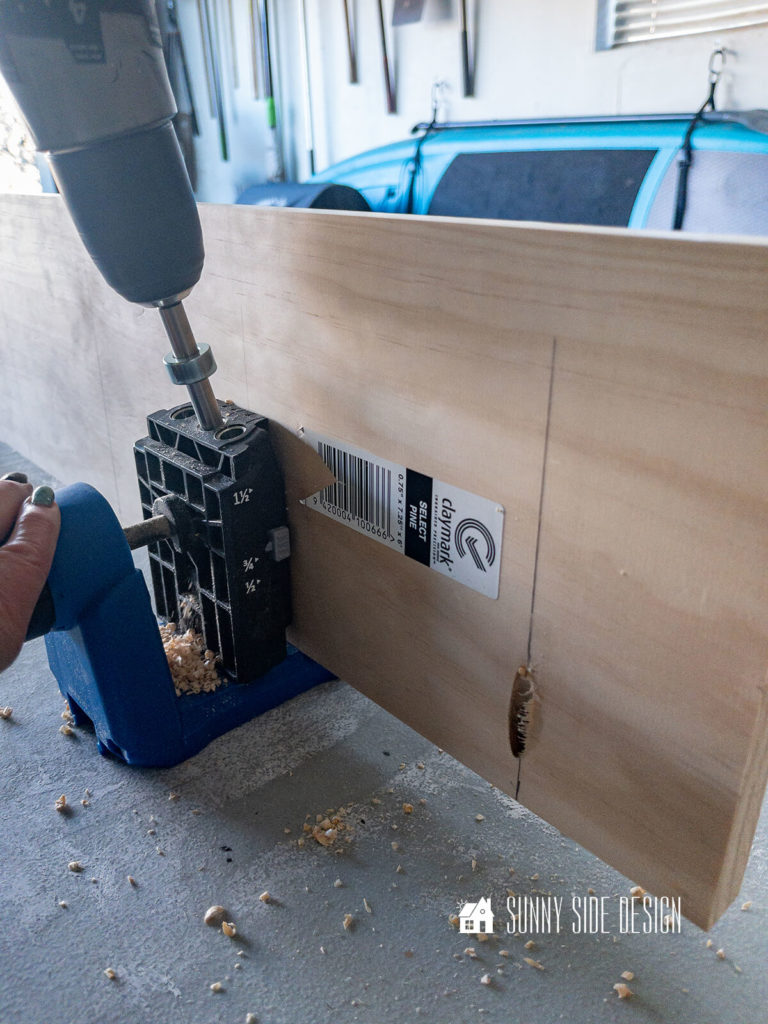
To make a secure joint we used our Kreg pocket hole jig to make a series of pocket holes spaced 6″ apart.
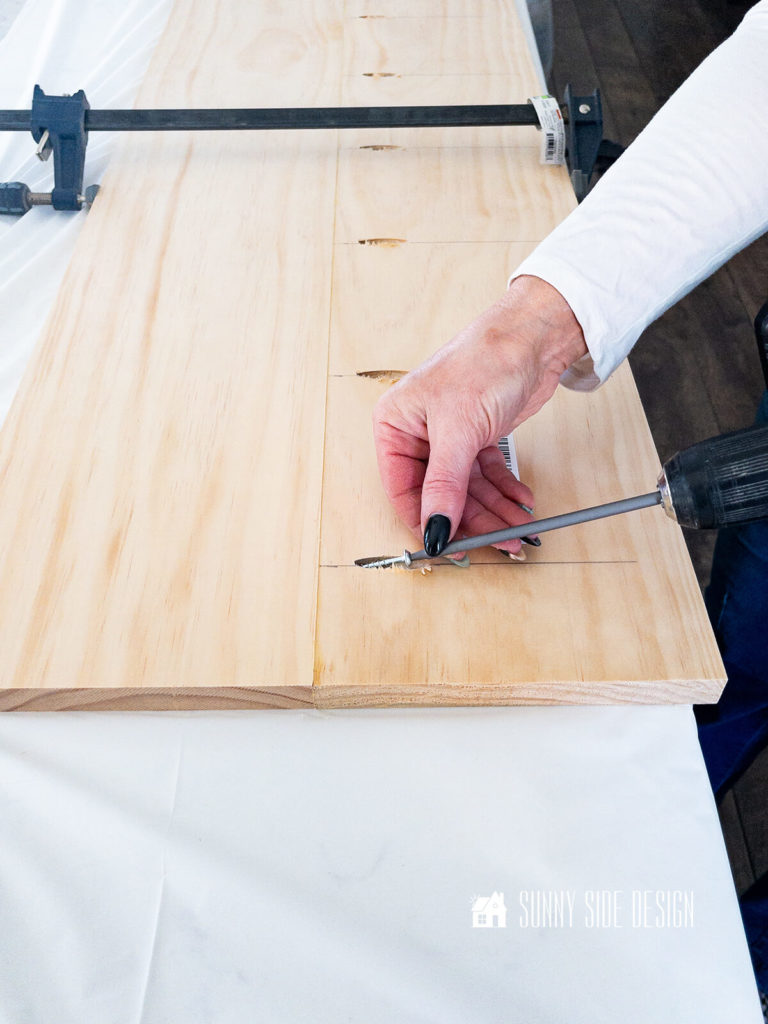
We then spread glue on the joint area, clamped the two boards together and inserted the pocket hole screws.
Allow the glue to cure for 24 hours, then the new hutch top can be cut to the proper dimensions.
We ripped the width of our boards with the Kreg rip-cut jig, which is so much easier than trying to handle a long board on the table saw.
Then we cut it to length with the miter saw.
Finally sand the new hutch top until smooth and attach to the top of the hutch with wood glue and brads.
Paint
Freshening up an old hutch top with paint can breathe new life into a tired piece of furniture, transforming it into a piece with style and charm.
Whether you’re aiming for a modern or a vintage-inspired look, the right paint can revitalize the hutch top and enhance its appeal.
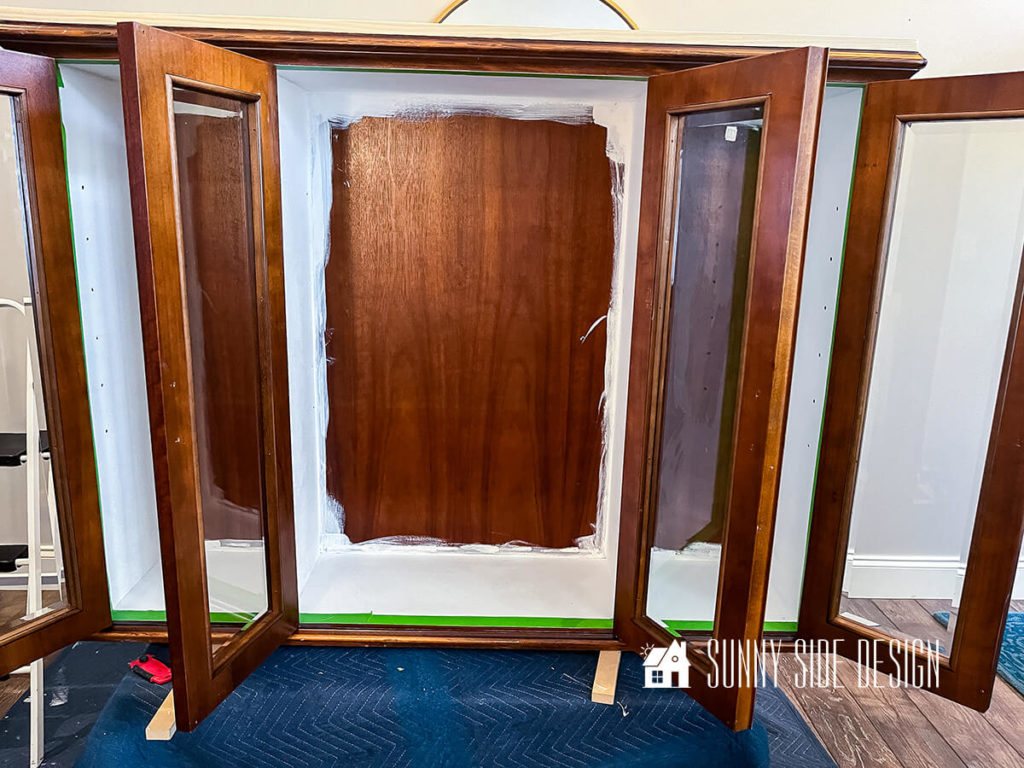
For the inside of the cabinet, we chose a white chalk paint.
And as I said earlier, it took three coats of paint to cover the dark brown finish.
We didn’t worry about painting the back of the hutch top, because we intend to cover it with wallpaper.
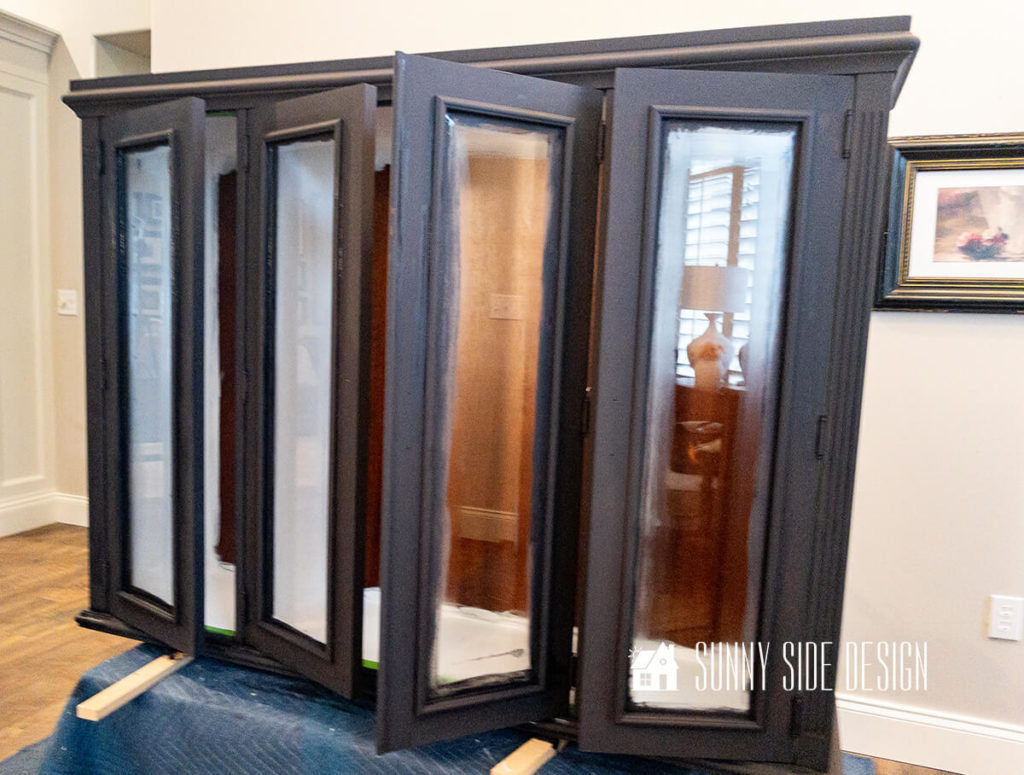
For the outside of the hutch we applied two coats of black chalk paint.
It’s the same paint I used on my china hutch.
Once the paint has dried, consider applying a protective topcoat to seal the finish and safeguard against everyday wear and tear.
In our case, we applied a clear wax to the hutch top and a polyurethane top coat to the shelves.
With a fresh coat of paint, your old hutch top will undergo a stunning transformation, becoming a piece you will love in your home for years to come.
I also tried a new product to me called Mask and Peel on the cabinet doors.
You apply the Mask and Peel to the glass and the edge of the wood frame.
It acts as a primer on the wood, and when dry you score the edge with a utility knife and peel off the mask from the glass.
Somehow I must have done something wrong.
After I scored the mask and tried to lift up the corner to peel, it only pulled off very small pieces.
So I resorted to using a straight blade to scrape off all of the Mask and Peel.
In my opinion, it would have been better for me to use masking tape.
But if you’ve used this product before and had good results, please share your tips!
Let’s stay connected! Follow us on social media!
Install Wallpaper to Back of Hutch Top
Steph thought if would be fun to add wallpaper to the back of the hutch top and once I found the legs, I knew a fun black and white stripe would be perfect.
I found the peel and stick wallpaper on Amazon, but once it arrived I realized it was more like contact paper.
Once I pulled the backing back on the wallpaper I discover that the white sections are somewhat transparent.
So then I needed to paint the back of the hutch top.
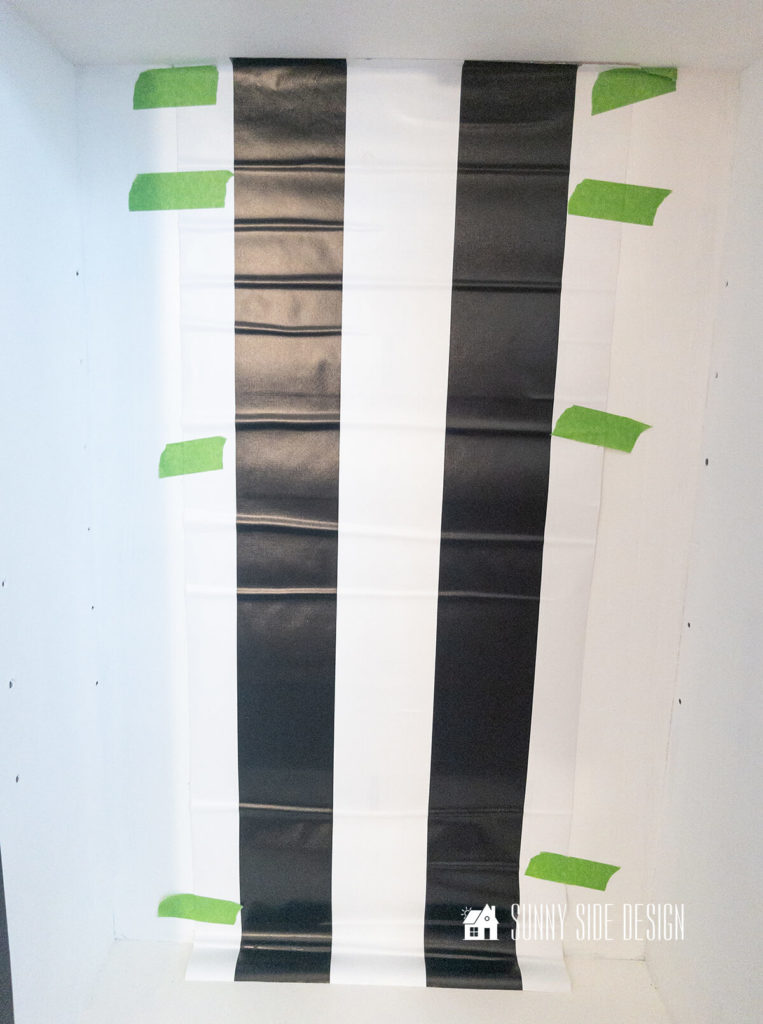
With such a large graphic design, I decided it would look best if I started in the center of the cabinet.
This was my first time working with a “peel and stick” wallpaper, and I wanted to ensure that the stripes were perfectly straight.
So I measured and taped the first piece into position.
Then I pulled back the backing a few inches and applied it to the back of the cabinet, smoothing it as I gradually removed the backing.
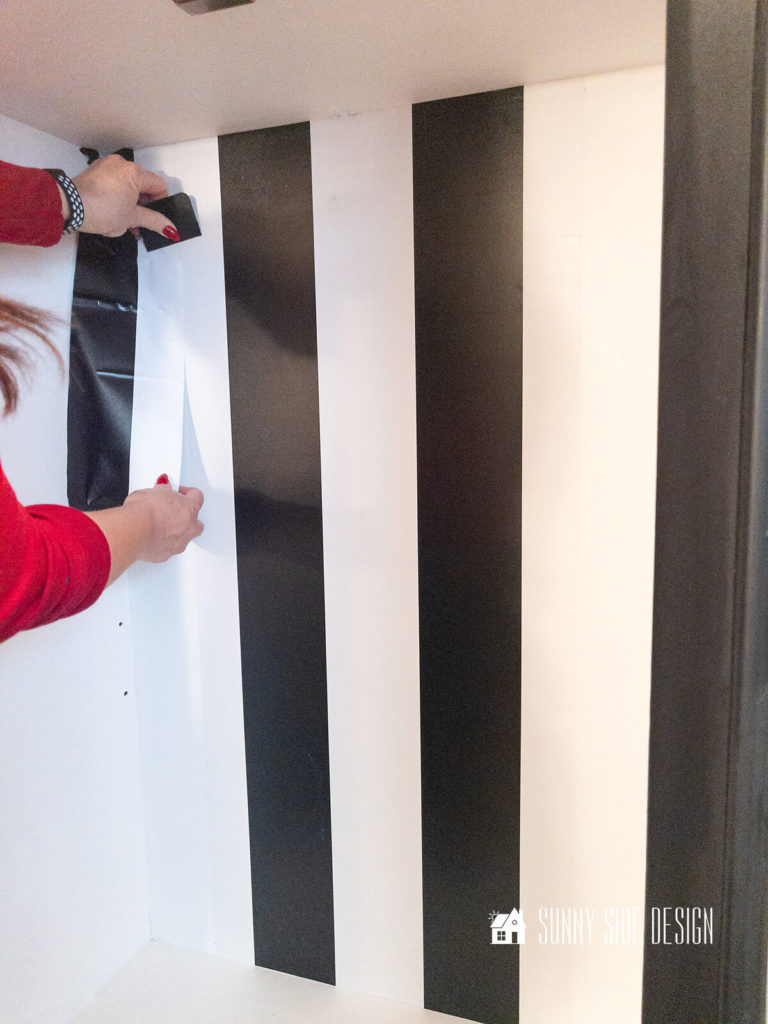
For each side I cut a strip that was about 1″ wider than the area, matching the pattern and smoothing it as I removed the backing.
Update Hardware
Updating the hardware on a hutch top is a simple yet effective way to refresh its look.
Whether your goal is to add a touch of modern elegance or incorporate a rustic farmhouse vibe, swapping out old or updating the existing hardware can instantly elevate the piece.
I believe the existing hardware is pretty and with a little update it will be stunning on my French-inspired cabinet.
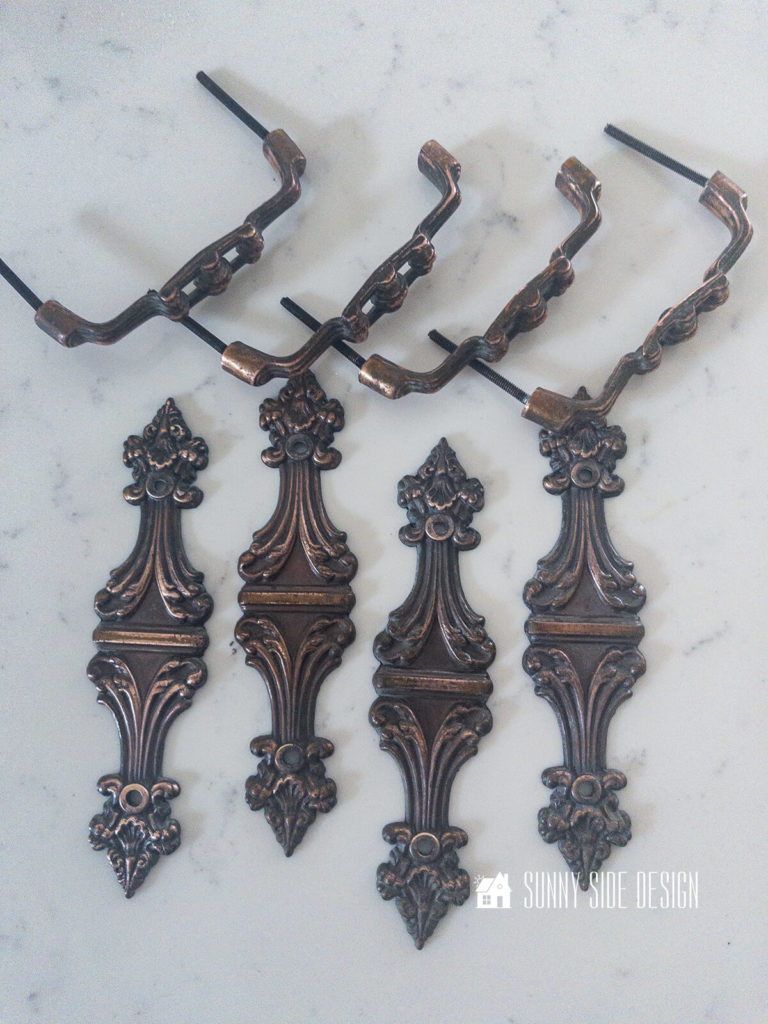
First I cleaned the hardware with Bar Keepers Friend.
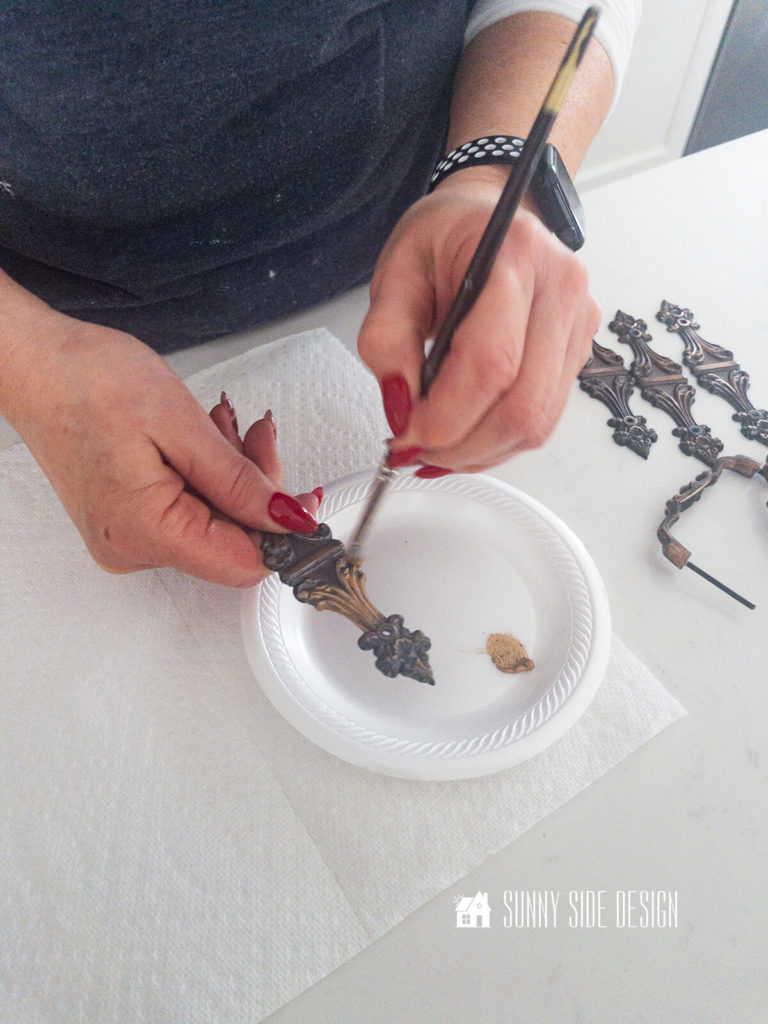
Then I applied antique gold Rub ‘n Buff with a stiff bristled brush, followed by buffing.
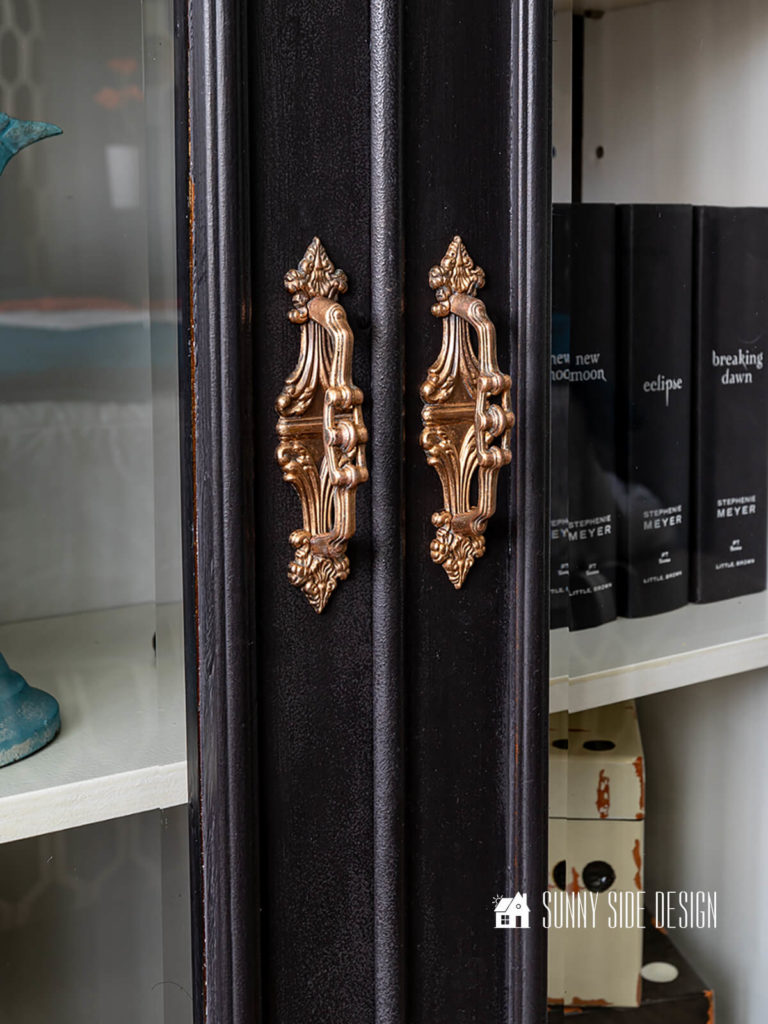
Once installed, the new hardware adds the perfect touch to the hutch top, that’s full of charm.
Add Legs
Adding legs to the old hutch top certainly updates its appearance and makes it more functional.
Choose legs that complement the overall style you’re going for with your repurposed hutch top.
Consider options like tapered mid-century legs for a retro vibe, or turned wooden legs for a more traditional look.
I immediately fell in love with the French-inspired furniture legs I found on Amazon.
In fact, once I saw them, they became my design inspiration for the entire piece.
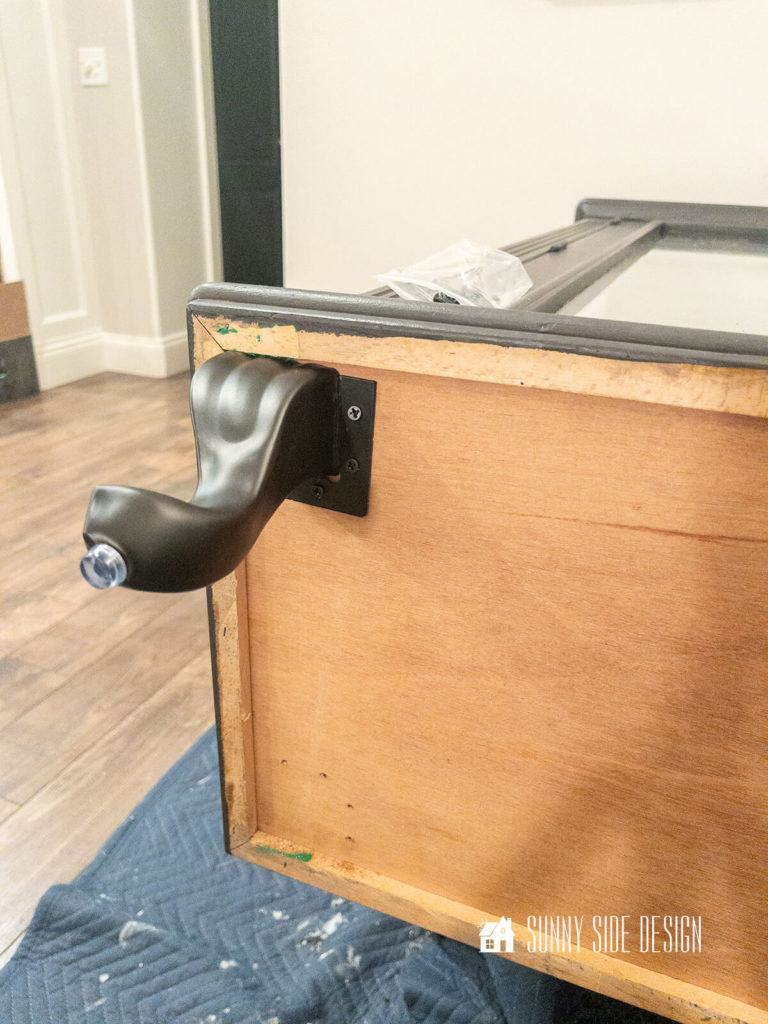
To install my legs I marked the screw hole placement and drilled pilot holes, then attached with the enclosed screws.
Once installed, the new legs not only enhance the overall appeal of the hutch top, but also provide added stability and elevate it to new heights—literally.
Whether you’re looking to raise the height of the piece for easier access or simply want to infuse it with a touch of personality, upgrading the legs is a simple yet effective way to breathe new life into your furniture.
Shop This Post

Disclosure: This post contains affiliate links or referral links for your convenience. It is a way for this site to earn advertising commissions by advertising or linking to specific products and/or services. Click here to read my full disclosure policy.
Repurposed Hutch Top Revealed
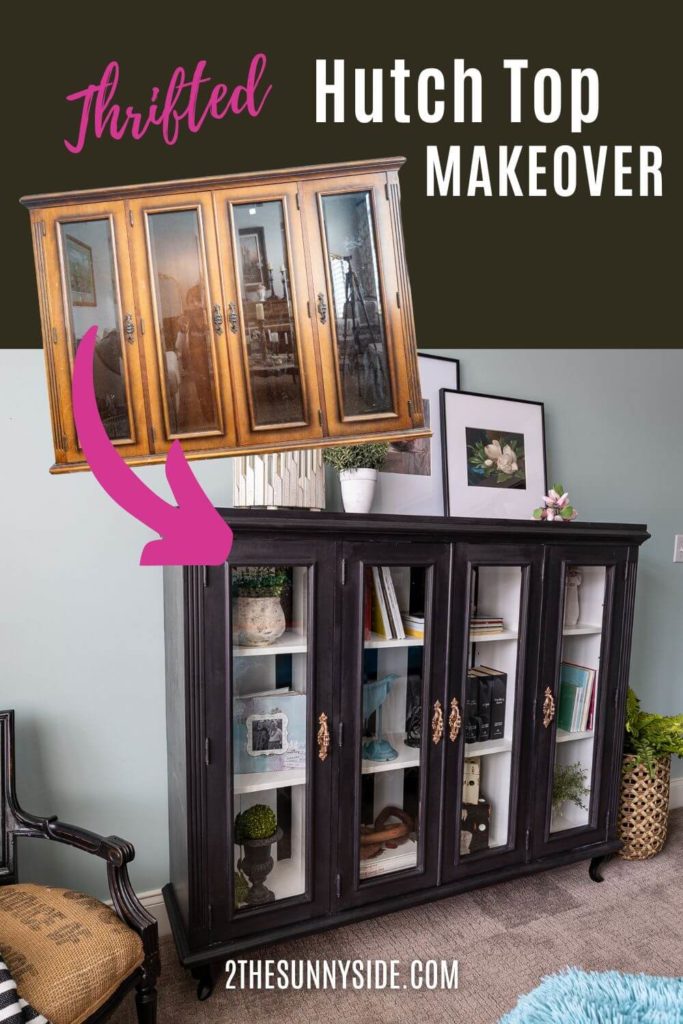
With a fresh coat of paint, updated hardware, and the addition of the new furniture legs, the transformation of the hutch top into a French-inspired masterpiece is finally complete.
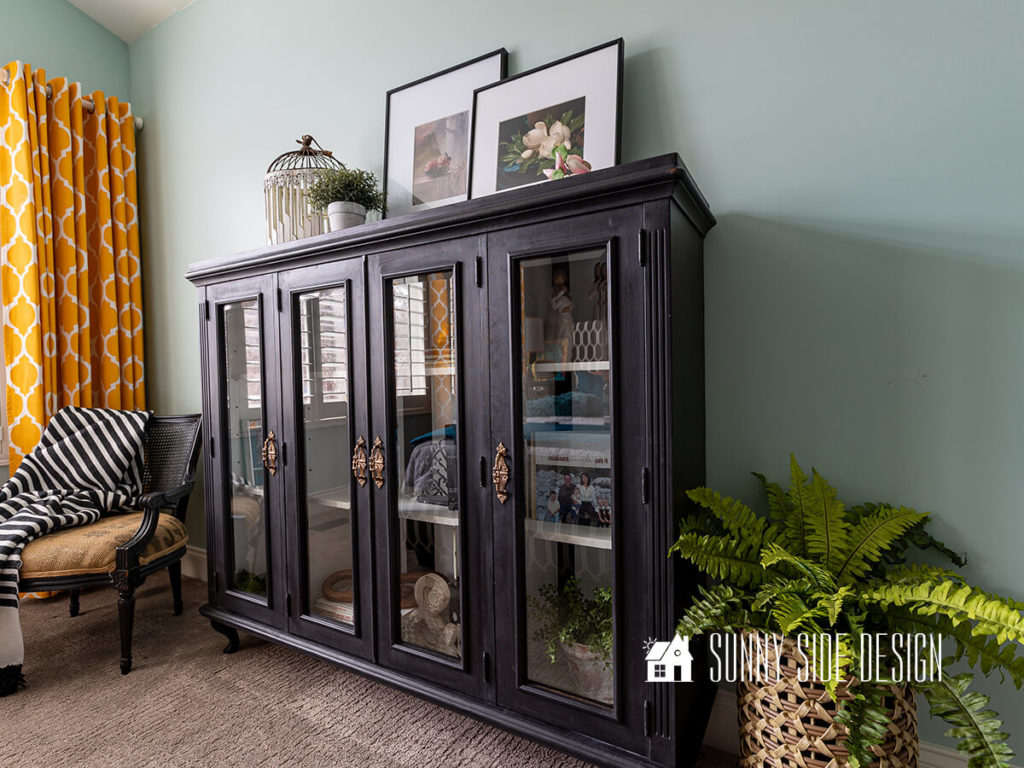
From its humble beginnings as a thrift store find to its current state, the hutch top now exudes sophistication and timeless French-inspired charm.

The reveal of this stunning makeover is nothing short of breathtaking and it looks perfect in my guest bedroom.
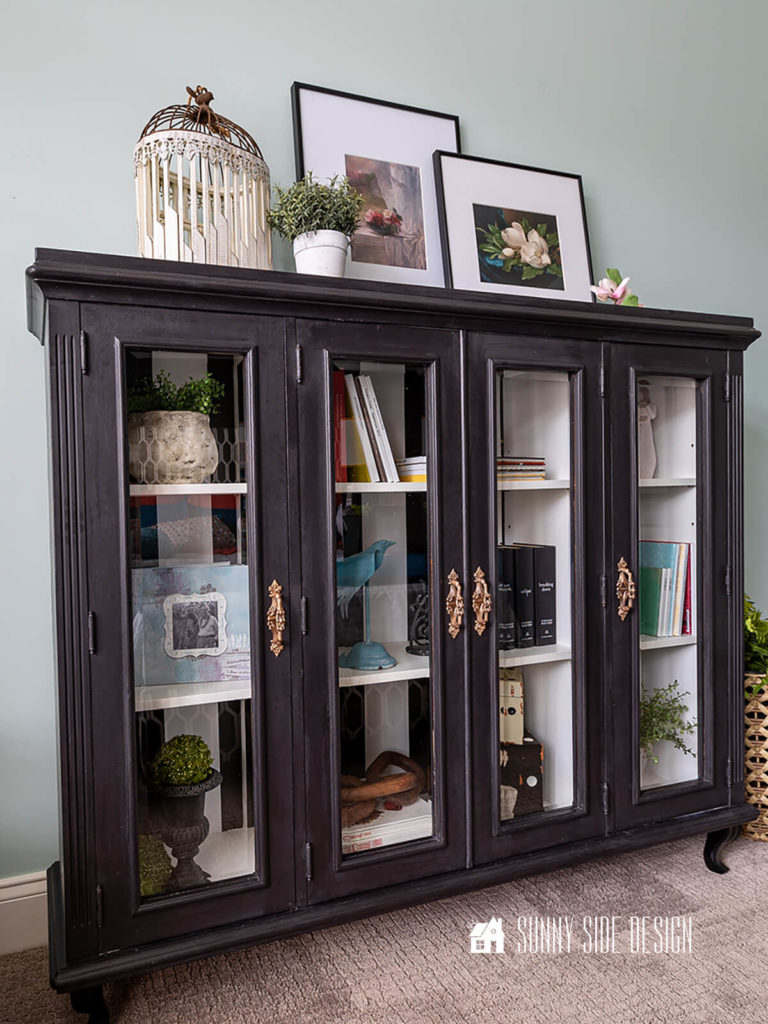
Is this a project you’d like to try for your home?
Love this idea? Then take a look at even more furniture makeover ideas:
- Simple Dresser Refresh
- Stunning Before and After Dresser Makeover with Cane
- Re-image Thrift Store Furniture into a Tool Chest Dresser
- DIY Floating Nightstand
- DIY Round Coffee Table
- Easy Chalk Painted China Cabinet
- Painting Furniture the Easy Way with a Wagner Sprayer
- Paint Furniture with Professional Results
- Transform Twin Beds into a Daybed
- How to Refinish Furniture with a Raw Wood Look
- Beautiful Wood Dining Table
- How to Use SaltWash for a Worn and Weathered Finish
- Easy and Inexpensive DIY Side Table with Thrifted Finds
- Easy Chalk Paint Coffee Table Makeover
- How to Glaze to Get a Coastal Look
- DIY Upholstered Headboard Tutorial
- Tool Chest Inspired Dresser Makeover
Thanks for spending some time with us today, we hope you’ve been inspired to repurpose an old hutch top for your home!
If you’re new here, WELCOME! We love having new readers and friends!
You can learn more about us here.
Let’s stay connected! Join our DIY community of doers so you won’t miss any of our weekly updates.
Please PIN and save for later, and share with your friends! Sharing helps grow our following!
Sharing is caring!
Thanks for stopping by and as always here at Sunnyside Home
Empowering you to create a home you love!
Retailers We Love
- Anthropologie
- Birch Lane
- Crate & Barrel
- Joss and Main
- Lampsplus
- Mark & Graham
- One Kings Lane
- Pottery Barn
- Rejuvenation
- Serena & Lily
- Wayfair
- West Elm
- Williams Sonoma
- World Market
Be sure to follow us on Pinterest for even more home decor and DIY ideas.
To see what we are working on before it’s on our blog, follow us on Instagram.
You will also find our video tutorials on our YouTube channel.
- How to Make a Simple Pampas Grass Wreath for Fall

- 10 Easy DIY Fall Decor Crafts You’ll Love
- Simple and Pretty Decorating Ideas with Scalloped Decor

- 25 Easy Ways to Decorate with Blue and White